dinsdag 11 november 2014

Chicken Kebab

So today I was watching Jamie's Comfort Food (again) and he was making a delicious chicken kebab and I thought: "Hey I can do that!" So I tried to remember as much as I possibly could to recreate it myself and change it a bit because I don't want to copy his recipe.

Keep in mind: The chicken has to marinate for preferably a few hours, so do that in the morning and not around 5 pm.

Delicious Chicken Kebab with flat bread for 2

  • about 300 grams of chicken thigh fillets
  • kardemom seeds
  • cinnamon
  • cumin seeds
  • koriander seeds
  • fennel seeds
  • paprika powder
  • garlic (a lot)
  • salt
  • pepper
  • bay leaves
  • yoghurt
  • peanut butter
  • red onions
  • red pepper
  • 1/2 pepper
  • greek yoghurt
  • parsley
  • 175 gr self raising flower
  • 1 ts baking powder
  • 100 ml cold water
  • sesame seeds
First toast the kardemom seeds, cumin seeds, koriander seeds, fennel seeds, cinnamon, paprika powder, salt en pepper in a frying pan (don't use any oil or butter).  After about 2 to 3 minutes smash them all together with a pestle and mortar and then add as much garlic as you want and the bay leaves. Then add a small spoon of peanut butter and some yoghurt.

If you have a really large skewer, there is no need to chop your chicken into smaller pieces. If you don't have, just use wooden skewers and prepare as you would when preparing for a BBQ.

Massage the paste into your chicken, put the chicken on the skewers together with red onions and red peppers and let it marinate for a couple of hours.

For the flat bread: knead together the self raising flower, baking powder, a hand full of sesame seeds, parsley, garlic and the 100ml water. Knead this for at least 2 minutes and then let it rise in a warm spot for 30 minutes (cover the bowl with a tea towel). 

For the delicious greek spicy yoghurt sauce you have to chop 1/2 a pepper, some parsley and yes.. more garlic. You can do this within 5 minutes. Mix all of this together and keep in a cool place.

The best way to get a delicious chicken kebab is to use your BBQ, but because it's November, I doubt that people will have the full equipment to use it. If you have a gas oven (like me), you are very lucky because that will make it taste almost the same.Iif you have a normal oven.. sorry. But the flavors are still very nice just not exactly the same.

So preheat your oven to about 170 C/335F (gasmark 3 or 4). I don't know exactly how long the chicken has to go in the oven, just check it after 30 minutes and then every 10 minutes. Depends on how large your chicken pieces are.

When your chicken is almost finished, make the flatbread: roll it out and then put it in a dry frying pan. One side has to have golden-brown spots and the other side very light spots because if you leave it in the pan for to long, there will be no way you can fold/wrap it later.

Put everything on the flatbread, don't go easy on the sauce and enjoy.

woensdag 29 oktober 2014

Food & London

Last week, I went to my favorite place in the whole wide world: London. There isn't a thing you cannot love about London: the people, the shops, the fashion, the transport and of course the food.
When I was an au pair (now already 3 years ago), I learned to love the English food the hard way. I gained 15 kilo's within the first 3 months (that is 33lbs) and when I hit the 75 kilo mark I thought: na-ah. NA-effing-Ah. So I tried to find a way to still eat the delicious English food and lose weight.

But back to the point. I was hoping I would be able to write something about my bread baking workshop at Recipease, but sadly it was cancelled due to staff.. whatever that means.
Luckily I did go to my favorite pub The Shakespeare to, again, have their delicious fish and chips with peas, had lunch at Fifteen, ate a delicious wrap at Camden and had one of the best mango ice creams I've had in a while near Portobello Road.

So in case you ever go to London, visit al these places if you can and ignore your diet for just one week. You will not feel guilty, I promise.

First I will persuade you to go to Camden. Not just because of the great atmosphere that you will find there, not because of the cheap books or amazing vintage fashion, but because of the food stalls outside. Every time I go to camden I try to eat something from a different stall meaning it's a dish from a different culture every time (Turkish, African, South American or just plain English). This time I had a delicious lamb wrap with lettuce, grilled peppers and a blue cheese-mayonaise dressing and Hanne (my dearest travel companion) also had a wrap with spinach, f
eta and chicken. It was delicious, so definitely check that out when you go to London.

The other thing that you will have to do is go to The Shakespeare. It is right next to Victoria station ,which you will most likely pass at one point, so check it out. Even if it is just for a drink or a sandwich. But I promise you that they have AMAZING fish and chips (second best I had in England, the best was in Brighton). But they also have other things and change the menu every now and then. Hanne had an enormous burger which I think was called The Big Ben Burger. It was sooo good.

And while you're there, make a reservation at Fifteen. Lunch isn't that expensive and you won't be hungry for the next couple of hours (Hanne and I just had soup for dinner that evening).
I had freshly baked bread with butter and a smoked salmon with creme fraiche and something I cant remember and Hanne had squash soup which was delicious (she was kind enough to let me taste it) and as a main she had broccoli with polenta and a green kind of mash (we couldn't figure out what it was, but Hanne assured me that it tasted very good). The menu at Fifteen does change everyday so don't focus too much on the menu you see online while making a reservation. Just go.. eat and enjoy!

The last thing I will blog about today is the ice cream I had at Gelato Mio near portobello road market. I had never noticed it before, but I was craving for something sweet when I saw this ice cream shop. It is really expensive (I think 2,90 for one scoop) but it was super super super super nice. The ice cream was so soft and full of flavor. As the dutch say: Alsof er een engeltje over mn tong piest. I don't know the English expression, but if I translate it it says: Like an angel is peeing on your tongue.. Now it sounds weird. Just trust me, it was delicious.

To conclude this blog, I just hope that all of you will one day visit London and try to visit at least one of the places. You will not regret it. But there are loads of other places in London where you can get really nice food, so go find your own favorite pubs or ice cream shops:)
But do go to Camden, always.

vrijdag 17 oktober 2014

Pimp my Dish! Spicy Mexican Chicken Wraps with Jeroen

This will be the first "Pimp my Dish" blog, in Pimp my Dish I will invite a friend of mine to help me cook one of their favorite dishes but in a slightly different way than they're used to. My first "guest" was Jeroen and his favorite dish was fajitas. I went online to find out what exactly the difference was between fajitas, wraps, tacos, enchiladas and a whole lot more.
Just to make it easy for everyone, I'm just going to name this dish Spicy Mexican Chicken Wraps.

This recipe is for two very hungry students, or three not so hungry students.

  • 400 gr chicken breast
  • 1/2 red pepper
  • 1/2 yellow pepper
  • 1 red onion
  • 4 cloves of garlic
  • 1 red chili
  • lettuce
  • greek yogurt
  • fresh or dried mint leaves
  • 1 spring onion
  • small can of tomato puree
  • 3 small tomatoes
  • water
  • cayenne pepper
  • salt
  • black pepper
  • 25ml tequila (they sell minis at most of the check outs at liquor stores)
For the tortillas (if you want to make them yourselves).
  • 300 gr flour
  • 175ml tepid water
  • 2 spoons olive oil
  • 2 ts baking powder
  • pinch of salt
slice 3 cloves of the garlic and the red chili. Mix this with the tequila, some salt, pepper and the cayenne pepper. This will be the marinade for the chicken. So if you have the time, do this de night/day before so the chicken can really absorb the flavor. But it's perfectly fine if you make it 30 minutes before dinner. Chop the chicken in small pieces, put it in the marinade and put this in the fridge for 30 minutes.

Now mix the flour, tepid water, olive oil, baking powder and salt and knead this for at least 5 minutes. Leave this in a warm spot for 30 minutes (cover it with a tea towel or something like that).

Preheat the oven to 170C/335F

Now is the perfect time to slice the lettuce, 3/4 of the red onion, red and yellow peper and the spring onion. You will eat this raw on your wrap, so put this is in cute bowls on the table. You can also make the greek yogurt with mint now: simply chop the mint very small or crumble it with your hands if you have dried leaves and mix it through the yogurt. This yogurt will give your wrap a hint of freshness (which you will need, because the wraps are very spicy).

After half an hour, slice the remaining 1/4 of the red onion and chop the last garlic clove, put some olive oil in a hot pan and fry these babies. Then add the chicken, while waiting for the chicken to be cooked, dice the tomatoes. When the chicken is no longer raw, add the tomatoes, tomato puree and some extra water so you have a nice sauce (if you want, you can add a stock cube but I think the chicken has enough flavor because of the marinade). Leave this on a low heat to simmer.

Now you're going to make your own tortillas. Try to divide the dough so you can make 6 to 8 tortilla's. Try to make them as flat as possible with a rolling pin.

Then take a large frying pan and make sure the pan is really hot (don't use any oil or butter and try not to burn yourself like I did).
Simply fry the tortilla on both sides for maybe a minute and then put it in the oven so that they will stay nice and warm. When you're done, bring everything to the table and enjoy your home cooked wraps!

enjoy!

zondag 12 oktober 2014

No Sugar, one week down and three days to go

First of all, sorry for my absence. I had a lot to do last week and since I'm going to London in a week I still have to take care of a lot of things. Yesterday I did a tea tasting session with my roommate and friend Hanne because we got some samples from http://www.teasenz.nl/
I will be blogging on that as soon as possible!

But for now I thought I would give you a small update on my Fed Up Challenge. For those who have no Idea what I am talking about: The Fed Up Challenge basically means that you have to stop yourself from eating sugar for at least 10 days.

On the sixth day I ate a tiny tiny tiny cookie and I feel horrible about it, but I was hungry and there was nothing else I could eat. But apart from that, I have done very well. No sweets and sugars. After a conversation with a fellow student on sugar, healthy eating and other things I decided that I was allowed organic raw honey (which I happened to have somewhere in the back of my cupboard). So I made a few cookies with that to fulfill my need for cookies.

So I have only been drinking tea, coffee and water for the past week and that is getting kind of boring so I'm going to buy something without sugar when I go to the supermarket tomorrow.

But after a week I feel great, I am not as tired as I normally am in the morning, I lost 3 kilos in a week, I feel better and healthier. So I really want to get everyone enthusiastic about this Fed Up Challenge. Just write down for one day how many sugar you eat, because sugar is in almost everything: In your drinks, in your bread, in a lot of rice and pasta, pasta sauces and cookies and sweets of course! Just write it down for one day and see how much it is when you realize the advise is to limit it to 8 teaspoons a day (thats about 32 gram).

So here is a head's up for the blogs that are coming:

  • A recipe for a nice chicken curry (made this in my pre-no sugar fase so there is some sugar in it), see the picture here on the right!
  • A recipe for a sugar free cookies
  • Tasting Time with Hanne (will hopefully be once a month) - topic " Teasenz"
  • Pimp my Dish, with a really good friend of mine: Jeroen
  • A blog on the bread workshop at Recipease
and maybe you can let me know how much sugar you eat a day:)

zaterdag 4 oktober 2014

White Chocolate Cheesecake with a Raspberry sauce

This was my masterchef audition dish and I personally think it's the best cheesecake EVER made. But that's just me, so I dare you to make it as well.

This recipe is for a small cheesecake and you can still feed about 8 people with it because cheesecake can be heavy on the stomach, but it's good. so good. love it.

It does take a while to make this, so I suggest that you make this de day before you want to eat it with your friends or by yourself.


  • 125 gr ginger cookies (speculaas for the Dutch people, and then add some ginger as well)
  • 60 gr butter + bit extra to grease the tin.
  • 250 gr frozen raspberries
  • 2 sp tabwater
  • 300 gr cream cheese
  • 4 gr vanilla sugar
  • 150 gr white chocolate
  • 65 ml creme fraiche
  • 2 eggs
  • fresh basil
  • black pepper
  • 1 ts gelatine powder
  • 5 sp white caster sugar
Preheat the oven to 160C/310F and grease the cake tin.
crumble the cookies in a food processor and melt the butter in a small sauce pan. Mix these two together and cover the bottom of the tin. Leave this to cool in the fridge for at least 30 minutes.

Now use another small sauce pan to make the raspberry-basil sauce. Add as many basil as you want, the frozen raspberries, the water, the gelatine powder and 2 spoons of the caster sugar. Leave this boil for at least 5 minutes. Then push it through a sieve with the round side of a spoon and put this also in the fridge with another basil leave for at least 15 minutes.

Now melt the white chocolate with the creme fraiche and the black pepper on a low heat.
While this is melting mix the cream cheese, 3 spoons of the caster sugar, vanilla suger and the eggs together until it looks nice and creamy. Then add the melted chocolate.

Take the cake bottom and the sauce out of the fridge when it has been in the there for the correct amount of time and now you will add everything in layers.

so first add some of the cream cheese mixture. Then you take a spoon and do a Jason Pollock with the sauce. Then add another layer of the cream cheese mixture and then the sauce again until your out of cream cheese. I like to keep some of the sauce separate to put in the cheese cake when it's done, but that's up to you.

Then when everything is in the cake tin, find a skewer and just poke in the mixture a couple of times, this will make sure your cake has a very artistic look when you slice it (haha).

now the next part is very specific for my cheesecake:

Boil some water and put this in a baking dish in a lower part of the oven. Make sure your cheesecake is in the middle of the oven. Leave it in the oven for 1 hour, then let it cool down in the oven for 20 minutes and then turn the oven on again for another 20 minutes. Then turn on the gril on for a few minutes because I like my cheesecake a bit darker, stay near the oven when you're doing this. You don't want to burn this delicious cake. And then let it cool down in the oven again for 30 minutes. Then 30 minutes outside the fridge and then for as long as possible inside the fridge.

And then you have an AMAZING cheesecake. 

dinsdag 30 september 2014

Savory Quiche

It's the end of the month and that means that my rent is due and I have no money. Literally.. I've got 15 cents until 6 October. That ment that I had to be creative today with all the things I had in the cupboard and the freezer to make myself a proper diner, but I did it!

I had some ups and downs while creating this savory quiche (mince had gone bad et cetera) but in the end it turned out quite alright. So here's the recipe for a small quiche for about 4 people.


  • 4 sheets of puff pastry (you do need to cut them in all sort of shapes but eventually it will fit)
  • 250 ml cream
  • 120 ml creme fraiche
  • 1 red pepper
  • 1 green pepper
  • 1/2 leek
  • 1 red onion
  • 3 cloves of garlic
  • lardons (as much as you want)
  • 2 eggs
  • salt, pepper, fresh rosemary
  • Optional: broccoli 
  • knob of butter for the cake tin
  • a small cake tin
I had some broccoli in my fridge which had to be used today. They're healthy so it's okay to add them if you want to.

Preheat your oven to 180C/355F

Heat up a pan with a bit of coconut oil or olive oil in it.
Chop the onions and the garlic, put them in the pan and then add the lardons. While this is getting a nice golden and crispy layer, you chop the green and red pepper and the leek as well. After a few minutes you add these to the pan and if you want to put broccoli in it as well, now's the time. Then season this with salt, pepper and rosemary.

Now just leave that on a low heat on the stove.

Take a small cake tin and make sure you divide the butter evenly across. If you miss a spot, the puff pastry will stick to it. Then cover the insides of your cake tin with the puff pastry. It's okay to cut them in different shapes.

Now try to leak as much of the water/fluids out of your pan and then add the cream, creme fraiche and the eggs. Now pour this mixture in the cake thin and slide it in the oven for approximately 45 minutes or until golden brown on the outside and "not-soggy" on the inside.

Enjoy!

maandag 29 september 2014

Food Photography - tips & tricks

As some of you know I am a cleaner at Photo Studio Duivelseiland in Amsterdam. They are one of the kindest people I've ever met in my life. They sometimes give me left over food or ingredients and I can come and see how they photograph or film food. So I suggest that you should all find a job like that.

But what I am going to blog about today is the accessories you need when you want to photograph food. Because at the studio they've got sooooo much. It is unbelievable.

First of all, you need several different surfaces. I like to use wood as a surface or a really nice table cloth. You also need a lot of different plates, glasses, forks, knives, cups, glasses and so on. This means that you will have to spend money on that and going to the nearest Ikea is not really an option then (you will have to spend a month's worth of salary). So here's what I do to keep the costs down:

I go thrift shopping. Yeah, go to YouTube and put that Macklemore song on, I know you want to.
No but I'm serious. I have been to almost every thrift shop in Amsterdam to find old plates which look like they came straight out of your grandma's cupboard.

But there is more, you can go to a flea market. The best one in Europe is right here in Amsterdam North: De IJhallen and it's open once a month (they're open THIS weekend, 4 & 5 October!). They have all kinds of things, not just tableware. So if you're looking for some vintage clothing, this is the place to be.

So come to Amsterdam, make it a fun weekend or day out. Spend a little money on tableware, whether it is for food photography like me, or to just have some really cool vintage tableware. Makes you feel all posh and fancy when eating a regular sandwich.

vrijdag 26 september 2014

Eat whatever you want! A Fitness Blog

Okay, my title may be a little misleading, but I am a firm believer that if you exercise almost every day, you can eat a lot. And "a lot"  includes sweets, cookies and other unhealthy stuff with loads of sugar.

If you know me in person, you probably know I'm not the skinniest girl walking the face of the earth, but I wouldn't say I'm fat either. I did a BMI test a week ago and my BMI is 22. You have a healthy BMI when it's between 18 and 25. So I'm somewhere near the middle, which is okay with me.

My biggest goal isn't to loose weight, would be great if it happened though, but my main goal is to stay like this (which is hard enough already). I have made a list of exercises I do to reach that goal every single day. So I made another week schedule which you will hopefully find useful.

It does take some time to do all of this, but because I do it I can eat chocolate, cookies and pizza! Yay!

Monday
On monday's I have swim practice, so if you don't practice a sport like me, go for a jog or a bike ride for at least 30 minutes. We also do work outs at the training, but I have to be honest here I haven't participated yet but I am going to start this Monday. So here's a set of exercises you can do at home:
- 20 lunges (start out with 10 on each side, if this is easy do 20 on each side)
- 20 squats
- 20 side squats (same as with lunges)
- 20 bridges
- 30 sec planking
- 10 push-ups (YOU CAN DO IT!)
- 20 climbers
- 10 sitting twists
- 10 front kicks
- 20 punches

Do this workout 2 or 3 times.

Tuesday
Because you did a lot on Monday, Tuesday is sort of a rest day. Do try to walk or ride your bike when you go places. It's cheap and good for you and the environment.
In the evening you do a 15-minute workout, take 30 seconds of rest between the exercises.
- 1 min jumping jacks
- 1 min lunges
- 1 minute planking
- 1 minute squats
- 1 minute climbers

repeat the whole thing.

Wedsnesday
Today is a fun day, I have dancing, so I suggest you do something like that as well. Maybe you can do some Zumba (there is a lot of that on YouTube) or just dance in your room, I know that you will probably feel really silly doing it, but it's fun. Find a tutorial for a dance online and enjoy yourself for as long as you want (preferably 30 minutes or longer).

Thursday
Same as monday. Go jogging or take a bike ride for at least 30 minutes and do the workout:
 20 lunges
- 20 squats
- 20 side squats
- 20 bridges
- 30 sec planking
- 10 push-ups
- 20 climbers
- 10 sitting twists
- 10 front kicks
- 20 punches

Friday
Today you get to have a restday, so go watch The Vampire Diaries or something like that and stay in bed! But ride that bike to the supermarket though!

Saturday
Same as tuesday! A 15 minute workout!

- 1 min jumping jacks
- 1 min lunges
- 1 minute planking
- 1 minute squats
- 1 minute climbers

repeat it:)!

Sunday
Hey, it's Sunday, chill :) Eat Pizza.

As you can probably tell by my charming picture, I use weights during some of the exercises because I want to train my arm muscles. But you don't have to do that unless you want to. Also try to drink 1,5 liters of water everyday especially while working out so you don't get dehydrated.

So here's what I do. You can switch 15 minute workout around during the week. There are weeks when I do mine on Friday instead of Tuesday.

But this is what I do to make sure that I can eat my pizza and cookies and won't gain weight. Let me know your fitness exercises or tips and tricks!


donderdag 25 september 2014

American Chocolate Chip Cookies

Whoooops! Totally forgot to post this yesterday. So sorry.
These are some delicious chocolate chip cookies, mine were in the oven a tad too long. So make sure that doesn't happen to yours. 

I am trying to perfect this recipe, I want my cookies to taste exactly like the ones you can buy in Sainsbury's. I think they're four for 1 pound.. So cheap.. So delicious. But still, try to make your own cookies!

American Chocolate Chip Cookies (two ways)
For 12 reasonably large cookies

  •  250 gr flour
  • ts baking powder
  • 200 gr caster sugar
  • 100 gr normal sugar
  • ts salt
  • 2 eggs
  • 170 gr butter
  • 125 gr dark chocolate
  • 125 gr white chocolate
  • almonds
  • dried cranberries
Preheat your oven to 170C/335F.

Chop your chocolate in small peaces and if you want to, you can also make the cranberries and almonds a bit smaller.

Now slowly melt the butter in a small sauce pan. While that is melting you mix together the flour, baking powder, caster sugar, normal sugar, salt and eggs. And when the butter is melted you add this as well. Your dough should be sticky! It's not like your normal shortbread biscuit dough.

Then just leave that for a few seconds to cool down. Because if you add the chocolate too early it will melt because of the hot butter. Divide the dough in two, one for the white chocolate and cranberries and one for the dark chocolate and almonds. Make sure that not all the chocolate is in one place.

Then make little lumps of dough and put them on baking paper. make sure you've got enough space between this little lumps because the cookies will grow in size!

Leave the cookies in the oven for about 12 to 15 minutes and then let them cool down for at least 15 minutes. They will fall apart if you want to eat them immediately. 

ENJOY!

dinsdag 23 september 2014

Fish and Chips in Beer Batter

This is not one of my own recipes, it's just standard beer battered fish and chips which you can find all over the internet. So technically I'm not steeling it from anyone. It's not that difficult to make, but it is sooo good. I'm still trying to perfect the recipe but I'm getting there.

I don't really work with grams and milliliters with this recipe, I just keep adding beer and flour until the batter seems okay.

Beer battered Cod with chips and broccoli (1 person)

  • enough cod for one person (For the Dutchies: kabeljauw)
  • Flour + ts baking powder
  • 1 beer
  • 3 medium sized potatoes if you want to make the chips yourself.
  • 1 broccoli
Turn on your fryer, 190C/275F, and your oven (same degrees). 
Make sure your fish isn't frozen anymore, or else the batter wont stick to your fish!

Peal the potatoes and slice them into a shape you like. Boil these in water with some salt for about 4 to 6 minutes. Drain them in a colander and let them dry.

Now start making the batter. Make sure it has a nice thick texture so it will stick to your fish. Make sure you have another bowl with just flour in it .

Season your fish with salt and pepper and then dip them into the batter. Then dip it in the bowl with the flour and then again in the batter. Then put it in the fryer. Make sure it doesn't touch the basket because it will stick to it. Leave the fish in for about 4 minutes. When you get it out put it in the oven so it will stay nice, crispy and warm.

Boil the broccoli, 4-5 minutes.

Now fry your chips until golden, also about 4 to 5 minutes.

You can make a garlicsauce to go with the cod:

  • spoon of yoghurt
  • spoon of mayo
  • peper
  • garlic
Mix all these things together and omnomnom!


Not a difficult recipes, but things can go wrong, so stay focused and enjoy.

maandag 22 september 2014

Me, myself and the market

As I have mentioned before, going to the market is super handy! At least, it is here in Amsterdam. I love going to the market and find a stand where they sell all kinds op cheap fruit and vegetables. We've got several of those at my market, so there is no doubt you've got one as well.

Hey, it's okay to be a cheapskate the first time you go to the market. Take your notebook or your phone and simply write down some of the prices of the same product as you walk past the many stands. We want to pay as little as possible for the best quality.

I took some pictures of my favorite fruit and vegetable stand as you can see down here. They have different kinds of fruits each week, depending on the time of the year and their supplier, and all of it for a very small price (and most of the time they round the price down while they're weighing the fruit, yay!)


 I also buy my bread at the market. It's cheaper than at the local bakery, but it has the same quality. Also, again, I have to eat spelt bread and my favorite bread stand sells the real deal for a low price: 1 loaf for 3 euros. The supermarkets either sell it for a higher price or sell fake spelt bread.
And just look at these pictures. Doesn't it look delicious?!


So if I were you, I'd go to the nearest ATM, get some money and go to your local market. Because it has saved me sooooo much money. And I need money. Because I'm a student with bad priorities, so I need money for other things (students reading this can probably relate to this problem).

vrijdag 19 september 2014

A smoothie a day also keeps the doctor away.

I have been drinking smoothies in the morning for a long time. Most of the time they consist of the same ingredients: yogurt, banana’s, spinach and linseed. But this week I decided to try a different type of smoothie each day and give you some info on why this is a healthy but also delicious snack. I get most of my fruits on the local market here in Amsterdam North (I'll do a blog on that asap) because most of the time it's much cheaper than in your local supermarket. Most of the smoothies I made this week contained some kind of red fruits because I couldn't find too many mangoes or pineapples at the market, sorry!

Monday
This handsome looking smoothie here on the left contains banana, mango, lowfat yoghurt, linseed, wheat bran and honey.
This is a really good smoothie to start a day with. Because this smoothie consists mostly out of banana, it's also good to drink this before a workout. Banana's can give you a real energy punch and they sustain your blood sugar. They also protect you against muscle cramps during workouts.
I eat/drink bananas because (i copied this from a nutrient site because it's too difficult to explain): "Bananas act as a prebiotic, stimulating the growth of friendly bacteria in the bowel. They also produce digestive enzymes to assist in absorbing nutrients."

Tuesday


This is a delicious smoothie with greek yogurt, berries, juice of a small lemon, a teaspoon of linseed oil, banana and 2 leaves of mint.

It's a really fresh smoothies because of the greek yogurt and mint. So I suggest drinking this one on a warm afternoon.

Mint is also very good for you digestion and it soothes the stomach in case of indigestion or inflammation. And it just tastes amazing!
And when you've got asthma, mint can be used as a good relaxant and it relieves congestion. But don't use it too much!
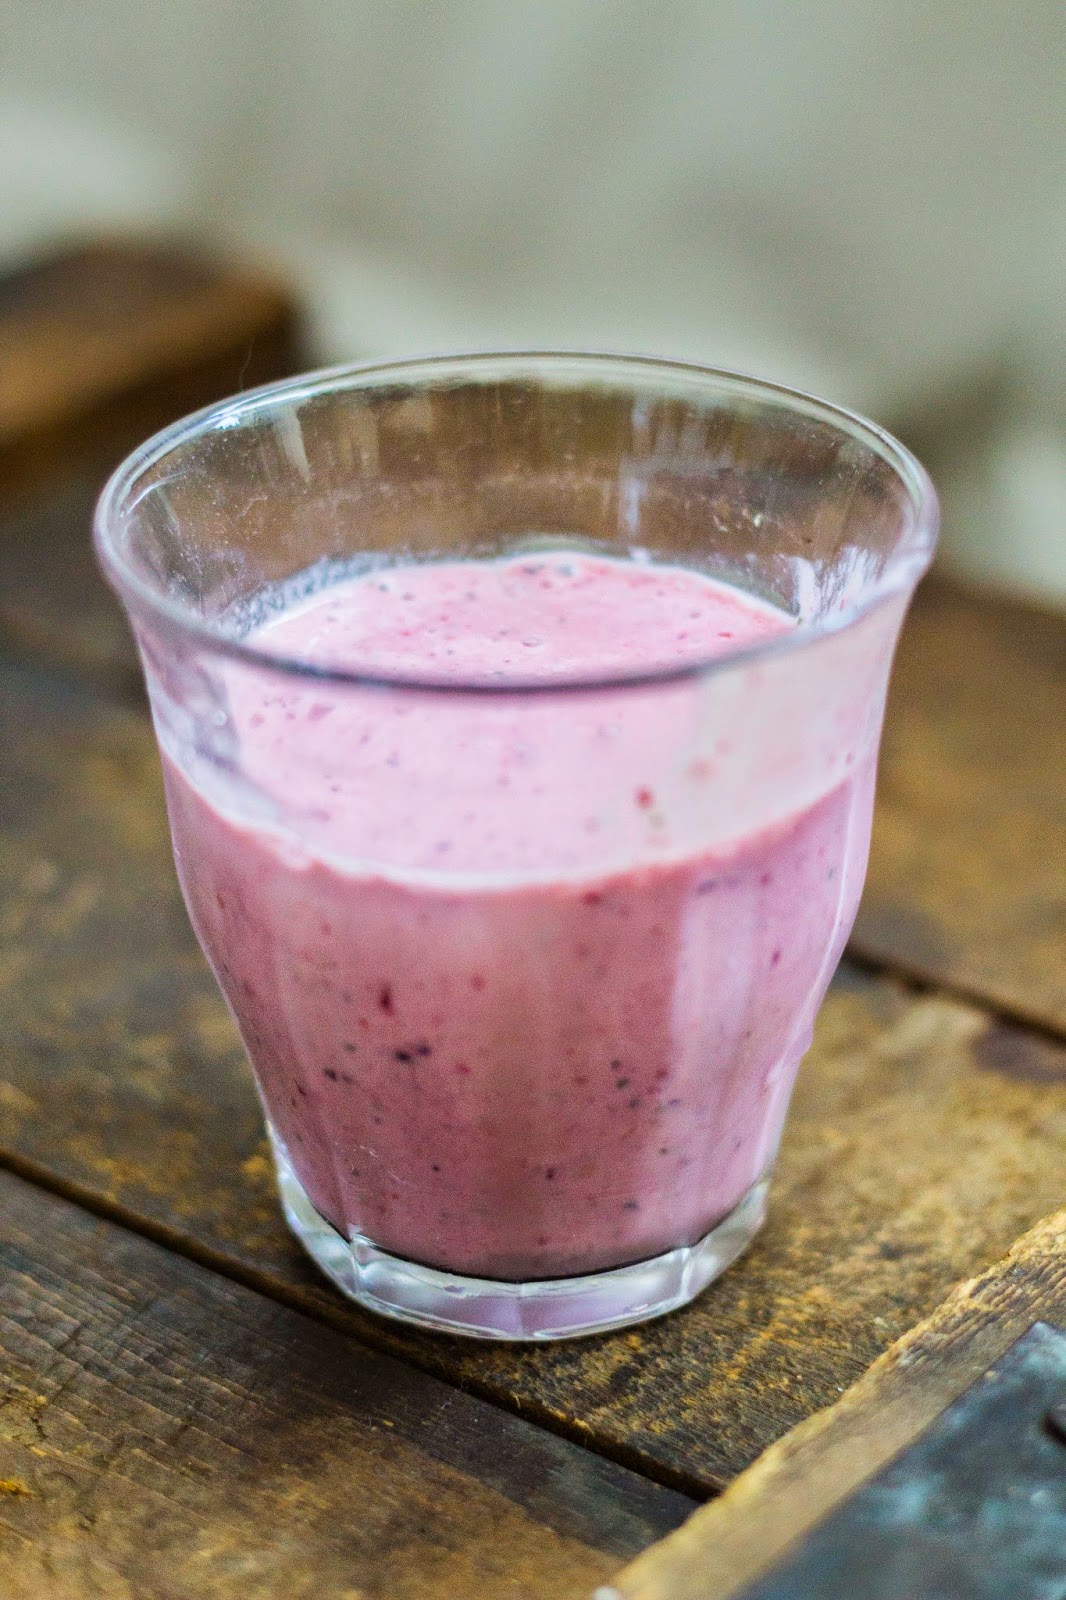

Wednesday
In this smoothie you will find a banana (of course), berries, low-fat yogurt and wheat bran. Not a very exciting one, but also very healthy and tasty. If you've never heard of wheat bran, don't worry. I'll explain to you some things about it. Wheat bran is good for all sorts of things. I use it for my IBS, but it's also good for lowering your blood pressure and apparantly is also good for preventing stomach cancer and hemorrhoids! Researchers all still looking at the effects of wheat bran, which include: preventing more types of cancer (bowel/rectum) and type 2 diabetes.

And on the plus side, wheat bran is not expensive and you don't have to use a lot all at once!

Thursday
So I thought I might be a good idea to also come up with some juices. You do need some type of juicer for this unless you don't mind having fruit pulp in your drink. You can always sieve the drink but that's quite a lot of work.
Juicers aren't that expensive either and you will not regret buying one!
This juice contains an orange, 2 apples and raspberries. There was a time when I hated raspberries. I wouldn't eat anything that even had the slightest amount of raspberries in it. But nowadays I love them. They contain loads of vitamins: C, B11, E and K. And they contain numerous of things like ellagic acid, which you can also find in goji berries, pomegranate and walnuts!
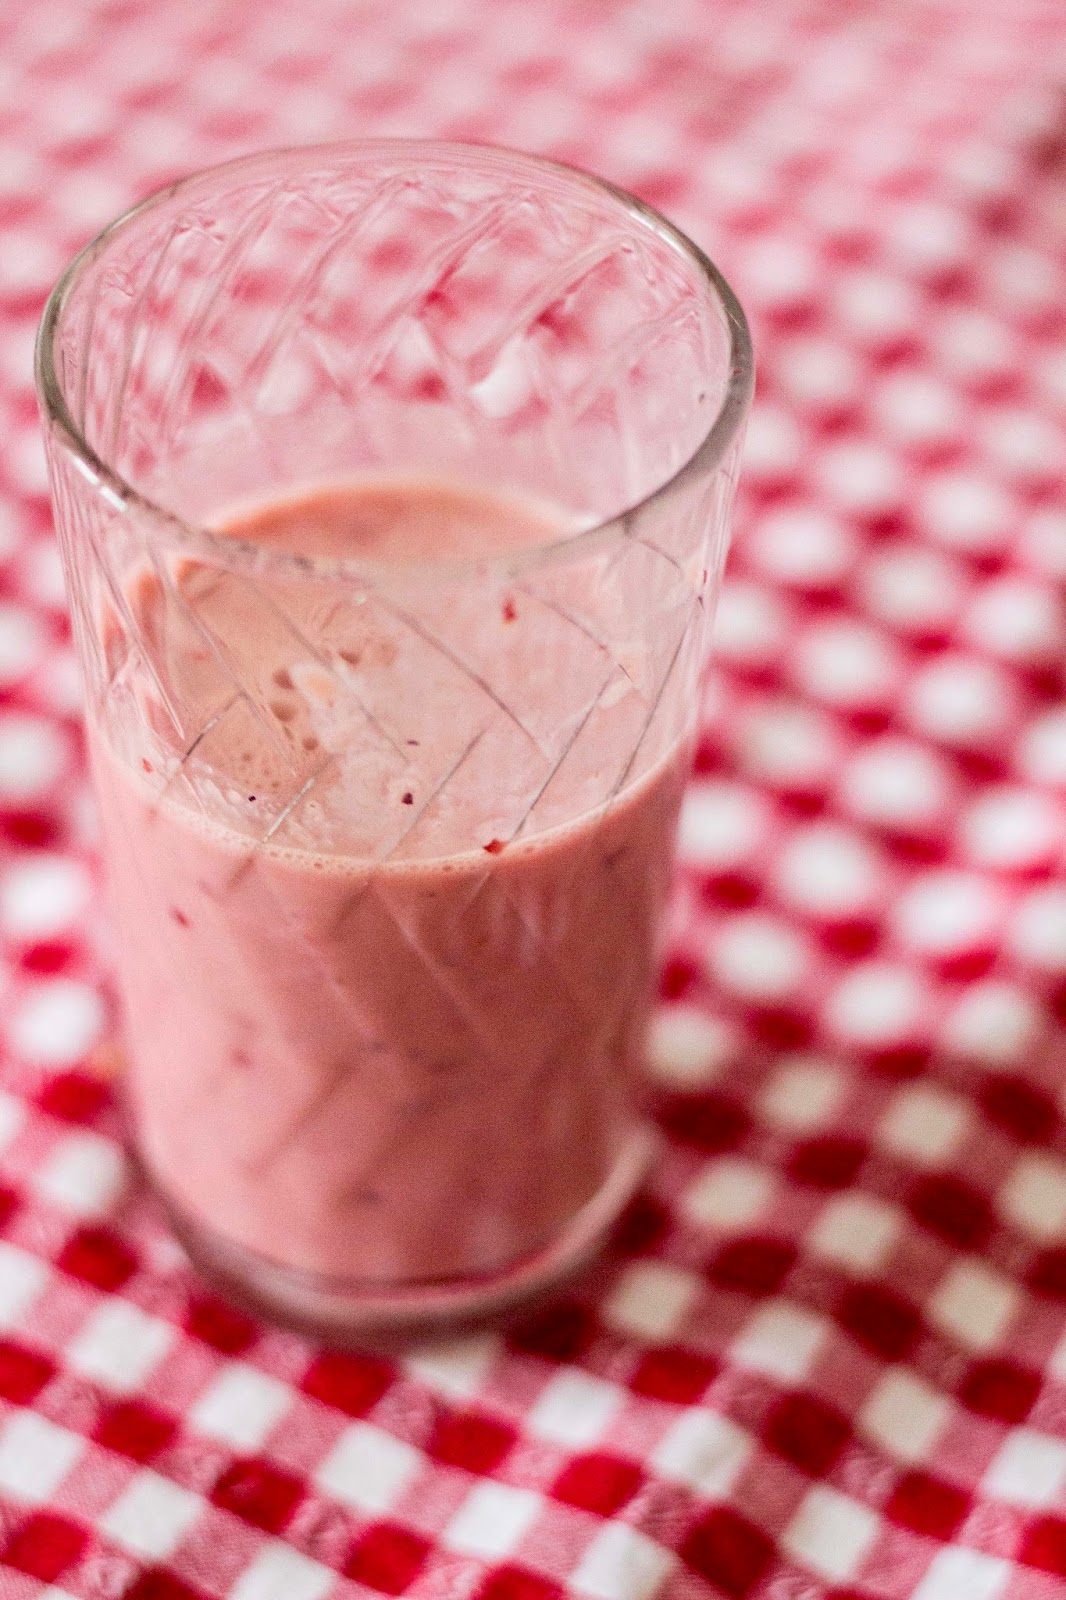
TGIFriday
In this thankgoditsfridayjuice you will find two apples, strawberries and raspberries and the juice of half a lemon. I don't put lemon juice in all my smoothies and drinks, but I do in some of them because I really like that sour taste of lemons and guess what?! Also very healthy! I found this great article on why lemon juice is good and instead of highlighting a few points, you should really read all of it, so here's the link:

http://www.fitsugar.com/10-Reasons-Lemon-Juice-Good-You-14860617


Saturday
I was out of apples today but I did by some pears on the market yesterday (I love pears, when they're either still a bit hard or all juicy and soft). So this juice is made with one orange, a pear, blackberries and a little drop of lemon juice.

Oranges are super duper healthy, they contain loaaaads of vitamin C. They help prevent a numerous of illnesses, they can give you an amazing energy boost (who needs coffee? just kidding, I do) and it lowers your cholesterol.

What are you waiting for?! Go forth and make this juice!


Sunday
This last juice is suppose to be made without a juicer. My nice made it and I asked whether I could use it for my blog. So here it is. It contains strawberries, a fig, an orange and a banana and you just add some water.

I personally don't eat all too many figs, I have an issue with the structure. But you don't really have that structure in a smoothie, so I should try them some time especially because apparently they are a really good way to stimulate weight loss! And what girl doesn't want to lose weight?


After writing this blog I realized how good fruits are and that we should definitely try to eat more of them in stead of cookies and sweets (even though cookies are amazing). I know fruit can be quite expensive, that's why you should make an effort and try to find a cheap stand at your local market or find an exotic supermarket near your house. For example, in Amsterdam we've got loads of Turkish and Moroccan supermarkets with cheap fruit and meat.

I hope I've inspired you to maybe have a healthy smoothie once a week or more!

donderdag 18 september 2014

Tiramisu Dutchie Style

I have this really old laptop, I got it a few years ago when I graduated high school (about 6 years ago). If I would be more like my brothers, nephews and uncles I would have bought a new one after maybe 1 or 2 years, but I didn't. Me and my Toshiba, we're homies. Sometimes a part breaks off, or it stops charging, but when something like that happens I give my uncle a call and I take the first train possible so he can fix my best friend. And when I go there I always take a cake or some type of dessert with me as a thank you.
I think my laptops enjoys spending time at my uncle's, because it decided to stop working when I was in the middle of making a tiramisu. So the next day I hopped on a train with my tiramisu to see my uncle again. I had never made a tiramisu before so I didn't know if my own creation would be a success. But my uncle and nieces approved of it (yay) and they said that it tasted like "Sinterklaas" (a Dutch holiday slightly similar to Santa Clause and Christmas). And that made sense, the Sinterklaas-flavor, because it contained pepernoten, a typical Dutch cookie we eat when it's Sinterklaas. 
So here's the recipe!

·         100 gr dark chocolate
·         50 ml sweet white wine
·         150 ml Greek yogurt
·         150 gr cream cheese
·         125 ml whipped cream (which you still have to "whip')
·         3 eggs
·         200 gr pepernoten (or use another biscuit, but this is really nice!)
·         nob of butter
·         125 ml fresh espresso 
·         50 gr sugar
·         ts salt

Make the espresso first and add 25ml of the sweet white wine and set this aside, it has to cool down. 

Take out two bowls, because in one bowl you have to put the egg yolk and in the other the egg white. Whisk the egg white and the 50 gr of sugar until you can turn the bowl upside down above you're head and nothing falls out. 

In the other bowl, whisk the egg yolks and add the cream cheese and the yogurt. Now turn that non-whipped cream into real whipped cream (haha) and add it to your cream cheese-yogurt mixture. You can now also add the egg whites. And if your feeling naughty today, add a bit of the sweet white wine as well (but not too much because else it wont set in the fridge). 

The espresso should be cold by now, so you can dip your pepernoten/biscuits in the coffee and put them in a glass tray or bowl which you will use to make your tiramisu.

Now melt the chocolate with the butter and the teaspoon of salt. When it has a smooth texture add 25ml of the sweet white wine and then poor everything over your pepernoten/biscuits. Now poor the mixture you made before on top of that. To top it all of you can grate the last 10 gr of chocolate over your tiramisu. 

Leave this fine looking dessert in the fridge for at least 1 hour, but the longer it stays in there, the stronger the coffee flavour will get (yum!).


dinsdag 16 september 2014

Cookbook Maniac

About 2 months ago a friend of mine introduced me to a fantastic site: play.com
It's probably similar to ebay or amazon, but what is so good about this site is that I can order secondhand books for a really small price and there are no surprises at the end. With that I mean: delivery is almost always for free! (Yaaay, we love free)

So here's what happened, my obsession with cookbooks kind off got out of control. I started ordering cookbooks mainly from Jamie Oliver (there are still 3 on the way) and I have probably used my credit card 10 times as much in the last month than in all the years before. But it is so worth it. Most of the books only cost me about 3 to 4 pounds!

But here's the real reason why I'm writing about cookbooks: I really want everyone to go out or online and buy yourself a cookbook that really speaks to you. It doesn't have to be from Jamie Oliver, Gordon Ramsey or any famous chef. It can also be a book on cupcakes or just any food magazine. Because what these cookbooks do, is help me to come up with new recipes and it should do the same for you. Here's what I do when I want to "invent" a new recipe.

Step 1: I take one of my cookbooks and look up a recipe that looks like a really tasty dish but isn't that complicated. Then I follow every step in the book. Nothing crazy, I won't add anything or leave anything out. And then I eat it. Omnomnom!

Step 2: A couple of days later I will make it again and then change some of the flavours, add some extra herbs or even re-size the portions. I really want to make this dish mine. For example: I made a cheese cake a couple of weeks ago and the first time it was just a plain ordinary cheesecake. The next time I made it, I used different cookies, added some lemon, orange and ginger and I made a lemon curd to go on top. And I like my cheesecake a bit darker that it normally should be, so I popped it back in the oven for an extra 15 minutes and turned the grill on for 2 minutes. Now it's a completely different dish!

Step 3: Let other people taste it. If they like it, good for you. But sometimes they know exactly what's missing to give your dish that extra "umpf!". So use those tips the next time you make it.

Step 4: This is an optional step. If your creation is an absolute hit among friends and family: Master it! Make it your signature dish!

So cookbooks are not just there to simply copy every dish, they should inspire you to come up with new recipes!

woensdag 10 september 2014

A few small changes

Ik zal dit in het Nederlands beginnen, ik ben vandaag naar mijn aller eerste bijeenkomst geweest van de Hema Blog Academy waar ik dankzij Bernadet voor was uitgenodigd. We hebben hier onder andere tips en tricks gekregen over hoe we onze eigen blogs naar een hoger niveau kunnen brengen en één van de dingen hierbij was het overschakelen van het Nederlands naar het Engels om zo meer bezoekers aan te trekken. Dus vanaf nu ga ik mijn uiterste best doen om te bloggen in het Engels. Als je nog vragen hebt over bepaalde dingen, kun je altijd een reactie achterlaten en zal ik gewoon in het Nederlands reageren! No worries.

The first recipe in my new style of blogging will be a delicous home made pizza. Because I have IBS (irritable bowel syndrom), I have to always make sure that I eat fresh fruit and for example eat spelt bread instead of white bread. So I will sometimes incorporate that in my recipes as I have done today.

Homemade Pizza (2 large pizzas)

  • 250 gr/ 2 cups of plain flour
  • 250 gr/2 cups of spelt flout
  • 7 gr yeast (most of the time one sachet)
  • 3 spoons of olive oil
  • 275 ml lukewarm water
  • 1 can of peeled tomatoes
  • 1 clove of garlic
  • dried basil
  • salt and pepper
For the topping you can use whatever you want, but I'll just pretend like everyone is going to make the pizza I just made

  • 1 red onion
  • 125 gr mozzarella
  • small hand of pine nuts
  • 1/2 red pepper
  • 1/4 zucchini
  • 1 mushroom
  • a handful of rocket lettuce. 

For the pizza dough: sieve the flower and add 2 teaspoons of salt in a large bowl. Make a small pit in the midst of the flour and add the yeast. Then add the spoons of olive oil and pour the water along the side of the bowl and then start kneading the dough for a few minutes until it's a smooth/elastic dough. Shape it into a nice round ball and put it back in the bowl. Cover the bowl with a tea towel and let it rest for 1 hour.

Puree the tomatoes and heat it in a large pan. Add some salt and paper, the basil and the clove of garlic. Let this simmer for about 10 minutes. 

Preheat the oven to about 250C/480F.

Slice the onion, red pepper, zucchini, the mushroom and the mozzarella.
Divide the dough in 2 (so you can make two pizzas), and roll them out, nice and thin. Put some of the tomatoes sauce on it and add your toppings. Put this in the oven for about 12 to 15 minutes.

In the last minute quickly toast your pine nuts. When the pizza comes out, put the rocket lettuce on top and finally your pine nuts. 

I hope you enjoy!

zaterdag 30 augustus 2014

Mastaaahchef

Oh oh oh, en dan krijg je in de lunchpauze bij de HEMA een belletje van de masterchef crew, of je die week erop op auditie wil om mee te doen met masterchef Nederland.

Duh, natuurlijk wil ik dat! Of ik een koud gerechtje mee wil nemen naar Hilversum donderdagochtend om 10 uur (vroeeggg). Nadat ik ophing, begonnen mijn hersenen (en die van mn moeder) overuren te draaien. Wat ging ik maken?! In de dagen erna heb ik verschillende dingetjes gemaakt waaronder dit recept: lemonginger cheesecake met een bodem van speculaas. Lekkert (ja met een t) EN zelfbedacht! Ik maak hem wel in een kleine bakvorm want cheesecake vult ontzettend! Dus tenzij je van plan bent de rest van de dag niks anders meer te eten, maak een kleintje:P

lemonginger cheesecake met speculaasbodem en lemoncurd on top!

  • 100 gram speculaasjes
  • 50 gram roomboter (plus een beetje om vorm in te vetten) voor de cheesecake en 125 voor de lemoncurd.
  • 300 gram roomkaas/zuivelspread
  • 60 gram crème fraîche
  • 1 eetlepeltje bloem
  • 90 gram witte basterdsuiker
  • 2 eieren voor de cheesecake en 3 voor de lemoncurd
  • gember
  • 4 citroenen
  • 1 sinaasappel
  • 200 gram fijne suiker

verkruimel de speculaasje in een keukenmachine/blender achtig is of in een theedoekje met een deegroller (goed als je frustraties kwijt moet). Smelt in klein pannetje de boter en mix dit met de speculaas kruimeltjes. Vet het bakvormpje in en leg de speculaasmix hier in en druk het goed aan. Zet dit minstens een half uur in de koelkast.

Rasp redelijk wat van de schil van 2 citroenen en sinaasappel en hou dit apart. Knijp ze daarna helemaal uit en meng dit met de roomkaas, de crème fraîche, de bloem, de basterdsuiker, de eieren, een goede theelepel gember en de schilletjes door elkaar. Giet dit over de speculaasbodem heen en zet dit ongeveer 2 uur afgedekt in de koelkast (sorry, weer wachten).

Verwarm nu de oven voor op 120 graden. Bak het daarna ongeveer 1,5 uur af in het midden van de oven en laat hem afkoelen in de oven. NO MATTER WHAT, OPEN DIE DEUR NIET TOT HIJ ECHT GOED AFGEKOELD IS. 

voor de lemoncurd: rasp ook weer de citroenen en doe dit in een kom met de 200 gram fijne suiker, 2 eieren en de 125 gram roomboter. Dit ga je laten smelten door middel van een au bain marie (spel ik dit goed:P?). Dus deze kom zet je in een pan met heet water. Zo smelt de boter langzaam. Roer dit af en toe door. Terwijl dit smelt knijp je 2 citroenen uit. Dit sap doe je bij de rest zodra de boter volledig gesmolten is, ook voeg je nu 3 eieren toe. Roer dit af en toe (het liefst met een spatel) door zodat het langzaam dikker kan worden. Dit duurt ongeveer 20 minuutjes. Giet het daarna in een schone koude pot, daar dikt het ook nog wat aan. (ik vind het ook lekker om door de lemoncurd wat gember te doen, dus tijdens het au bain marie gebeuren, maar dat hoeft niet!)

Als de cheesecake volledig is afgekoel kun je de lemoncurd erop smeren. En klaar is kees!

eetsmakelijk!


maandag 18 augustus 2014

Gezond gezond gezond

Zoals sommigen inmiddels al weten heb ik kort geleden besloten om volgend jaar te beginnen met de koksopleiding. Ik denk dat ik daar wel gelukkig van word, in tegenstelling tot opzoek gaan naar symbolen in saaie films.

Gisteren was ik jarig en ik ga voor een "gezond jaar". Dat betekent niet dat er geen koekjes etc. meer in dit huis te vinden zijn, of dat ik spontaan geen mayonaise meer eet (dan had ik namelijk op dag 1 al extreem gefaald). Nee, ik wil proberen om gezonder te koken en gevarieerder te eten. Vier keer per week gebakken aardappeltjes is saai en ik moet dat zien te voorkomen omdat ik vaak tot sluitingstijd bij de HEMA werk. Dan ben ik met geluk rond half 8 thuis en moet ik nog koken en bahbah, daar heb ik dan vaak geen zin in.

Dus ik heb de afgelopen paar weken veel naar Jamie Oliver gekeken en zijn tips en tricks over snel eten klaar maken en hoe je ook eten kan bewaren. Ik wil deze trend voortzetten daar Jamie's ideeën te gebruiken en aan te passen.

Het eerste recept wat ik in het thema van gezond en goed voor je lijf ga gebruiken is mijn super lekkere zelfgemaakte tosti. Nu denk je vast, wauw.. een zelfgemaakte tosti.. fantastisch. Maar ik bedoel hier dus mee dat je hem niet alleen zelfstandig belegd, nee nee. Je maakt het brood lekker zelf!
Als je witbrood mag eten (ik niet), is dit zeker een goedkope manier van brood maken. Je hebt alleen wat bloem, water, gist, zout en suiker nodig, that's it! Maar voor de spelt-etende-gemeenschap is dit niet altijd goedkoper dan een speltbrood bij de AH halen. De lekkeredingenbakker is wel duur en een normale bakker vast ook wel. Dus om daar een beetje op te bezuinigen heb ik voor de helft speltbloem en voor de andere helft volkorenbloem.

Brood (een hele)
1 kg bloem (of 500 gr spelt en 500 gr volkoren)
600 a 650 ml lauw water
30 gram gist
beetje zout en suiker
(eventueel zaden en pitten)


heel simpel: zorg dat je een groot en schoon oppervlakte hebt, zoals een grote snijplank. Leg hier je bloem op en maak er een soort van schildvulkaan van (voor de non-aardrijkskundigen onder ons: plat en breed). In het midden komt namelijk de helft van het lauwe water.
Mix dit met een vork samen met het bloem maar doe dit dus rustig zodat je schildvulkaan niet openbreekt en het water alle kanten op stroomt.
Als het een beetje dikkig wordt, voeg je langzaam beetje bij beetje het water erbij. Als het mixje op een gegeven moment te dik wordt om nog goed met de vork verder te gaan, is het tijd om je handjes vies te maken en gaan we agressief kneden! Ongeveer 5 minuutjes tot het lekker kneedbaar en elastisch is.
Zorg ervaar dat je een schaal hebt waarin je een beetje bloem gooit (zodat het deeg niet blijft plakken als het gaat rijzen) en zet deze op een warme, vochtige plek (leg er dus bijvoorbeeld een vochtige theedoek overheen). Laat dit nu lekker rusten. De deegbal moet ongeveer twee keer zo groot worden, dit duurt ong 30 a 40 minuten. Nu kun je hem aanpassen naar smaak, dus bijv. wat zonnebloempitten erin of erop (Lijnzaad, sesamzaad etc). Laat dit nu nogmaals een half uur rijzen, ja je blijft bezig,

Verwarm je oven voor op 180 graden en bak hier je brood ongeveer 30 minuten in af.

Om nu mijn lekkere tosti ervan te maken, ik leg altijd bovenop de tosti 2 a 3 dunne plakjes tomaat en smeer hier een beetje olijfolie op zodat dit lekker mee grilt in de tosti-ijzer. omnomnom.


Heerlijk! eetsmakelijk!

zaterdag 9 augustus 2014

Kom op konijntje...

wiebelen wiebelen
Het is alweer een tijdje geleden sinds ik iets heb gepost, maar ik wil gewoon goede dingen posten. Geen vies smakende dingen of lelijke foto's.

Gisteren kreeg ik allemaal gratiesch groente en kruiden mee van de fotostudio waar ik schoonmaak. Echt super lief van ze, want dat kan ik als arme student natuurlijk super goed gebruiken. Maar nu kreeg ik ook twee konijnenbouten mee. Oké.. oké.. nog nooit gemaakt dus we gaan gewoon op gevoel iets maken. En goddamn, het was lekker. Dus voor jullie, konijnenbouten met een rode wijnsaus op een bedje van (ja.. gekookte?) groente en gebakken aardappeltjes met schil. (ik ben op de foto de rode wijnsaus vergeten:P)


Ingrediënten.


  • 2  of meer konijnenbouten
  • 1 grote wortel
  • 1 rode ui
  • halve rode, gele en groene paprika
  • kastanjechampignons
  • 1 prei
  • 2 teentjes knoflook
  • 3 laurierblaadjes
  • 2 takjes tijm
  • 2 takjes rozemarijn
  • roomboter
  • bouillonblokjes van maggi
  • 3 middelgrote aardappels
  • allesbinder
  • zout
  • peper
  • olie (ik gebruik hennepolie)
  • 600ml water
  • 400ml rode wijn

breng de 600 ml water aan de kook samen met de bouillonblokjes.

Snij het uitje en de knoflook fijn en fruit deze in een koekenpan. Snij alle overige groenten ook klein en voeg deze toe samen met de kruiden. Als dit een beetje gebakken heeft voeg je het toe aan de bouillon en vervolgens voeg je de wijn toe, laat dit lekker pruttelen.
Vervolgens bak je in diezelfde pan de konijnenbouten. Zorg dat ze een goed goudbruin kleurtje hebben en gooi ze bij de bouillon erin. Dit moet ongeveer 45 minuten tot een uurtje pruttelen. Voeg hier een klontje roomboter aan toe en wat zout en peper.

Vervolgens ga je de aardappels wassen en snij je ze in verschillende vormpjes (zodat ze niet aan elkaar gaan plakken als je ze bakt, dat gebeurt met schijfjes). Deze kook je ongeveer 4 minuten. Daarna kruidt je ze met zout en rozemarijn. Deze bak je in dezelfde koekenpan samen met een goed stuk roomboter. Zorg dat je ze lekker zacht zet zodat ze lekker zacht worden vanbinnen en krokant van buiten.

Roer af en toe in de bouillonpannetje (geen deksel erop!) en schudt af en toe die aardappeltjes rond.

Als je bouillon bijna klaar is zet je de aardappeltjes iets hoger zodat ze echt lekker krokant worden. Dan haal je de konijnenbouten eruit en laat je ze even rusten in alufolie of gewoon op een snijplankje.

Zet nu de bouillon op hoog vuur en voeg een eetlepel allesbinder bij. Als het goed is wordt het nu dikker zodat het straks een lekker sausje is. Als het niet lukt, doe er nog een beetje allesbinder bij. Als het dik genoeg is doe je het prutje in een zeef zodat je de groente en de saus apart krijgt. Haal daarna alle takjes en blaadjes tussen de groente uit en gooi het weg. Leg alles op je bordje en smikkelsmakkel:)


vrijdag 20 juni 2014

Oh England, i misseth thou ev'ryday

Zoals de titel al zegt mis ik Engeland elke dag. Ik mis de mensen, het eten, de sfeer, de winkels. Ik mis het gezin bij wie ik bijna een jaar heb mogen wonen en waar ik me een deel van voelde. Ik mis de weekenden met al mn vriendinnen. Bijna elke zaterdag in de metro naar Camden om nóg meer kleren te kopen (of in mijn geval boeken die er gewoon mooi uitzagen maar ik toch nooit ging lezen). "Even" naar de Primark voor een panty of een paar sokken. De white café mokka in Starbucks en de Chicken Legend in de Mac samen met Denise (hij bleef lekker).

Dus ik ga proberen nu om deze zomer typisch Engelse dingen te posten. Vandaag, weer, scones alleen dit keer heb ik het recept aangepast en ze waren errug lekker!

8 grote of 12 medium scones

  • 250 gram zelfrijzend bakmeel
  • eetlepel bakpoeder/baksoda
  • theelepel zout
  • 2 zakjes vanille suiker
  • 1 eetlepel suiker
  • 50 gram ROOMboter (we stappen af van de margarine en gebruiken voortaan roomboter, ook al is het duurder. het is veeeeel lekkerder).
  • 1 ei
  • 75 ml volle yoghurt
Ik heb dus dit keer meer vanille suiker gebruikt en volle yoghurt. Puur toevallig omdat mn melk op was maar "o em gee" het was lekker.

Voor op de scones: clotted cream van de M&S (soms ook te koop bij de jumbo), alternatief is creme fraiche of zelfgeklopte slagroom. En aardbeien gelei :)


Verwarm de oven voor op 220 graden, lekker warm. 

Zeef het bakmeel en de bakpoeder en mix het daarna met alles :) zorg ervoor dat je deeg niet meer heel erg plakt, een heel klein beetje is niet erg maar je handen moeten niet vast blijven plakken aan de kraan.

Ik maak mijn scones in een cupcake blik omdat ze dan gewoon de lucht in gaan, dus dan moet je het bakblik even invetten, maar schijnbaar kan het ook gewoon op bakpapier. Ik raad je wel aan om er dan echt voor te zorgen dat het niet meer plakt zodat je deegklompjes niet in de breedte gaan uitzetten maar de hoogte in.

Bak de cupcakes tot ze een mooie goud-krokante buitenkant hebben en eet ze warm!


tip: ook errug lekker met rozijntjes erin!

donderdag 5 juni 2014

Chocomonsters opgelet

Ik zeur al weken dat je nergens in Nederland single cream, double cream of clotted cream kan halen. Maar ik had het fout. De fantastische Marks & Spencer in de Kalverstraat heeft dit natuurlijk wel. En wat betekent dit? Natuurlijk, ten eerste zou ik taart gaan maken met die lekkere double cream en ten tweede ga ik binnenkort dus heerlijk verse scones met clotted cream eten

Maar nu eerst, de double cream. Ik besloot om er een heerlijke chocolade taart van te maken want iedereen houdt van chocolade.

Bodem

  • 125 gram bloem
  • theelepel cacaopoeder
  • 60 gram roomboter (ongezouten)
  • 60 gram kristalsuiker
  • 1 eitjes
  • 40 gram pure chocola
  • snufje zout
  • (ongekookte rijst)
Vulling
  • 200 gram pure chocolade
  • 300 ml double cream
  • pure chocolade pasta of hazelnoot pasta
  • 50 ml volle melk
  • 2 eieren
  • 100 gram kristalsuiker
  • 2 zakjes vanille suiker
  • 2 theelepels cacaopoeder

Eerst ga je bezig met de bodem. Zeef de bloem, het zout en de cacaopoeder in een schaal.
In een andere schaal mix je de boter en suiker tot een romig mengsel. Vervolgens smelt je de 60 gram chocolade. Dit voeg je samen met het eitje toe aan het boter-suiker mengel. Dit mix je vervolgens met het bloem, zout en cacaopoeder tot een zacht deeg. Dit verpak je in vershoudfolie en laat je ten minste 30 minuten in de koelkast liggen!

Nu mag je ook 30 minuten niks doen en niet vast aan de bodem beginnen anders brand je vulling aan voor de bodem klaar is.

De oven mag je wel eventueel voorverwarmen op 190 graden.

Na 30 minuten haal je het deeg uit de koelkast, rol je het heel dun uit en leg je dit in je taartvorm (liever een wat kleinere taartvorm, want dan wordt je taart wat hoger. die van mij was nogal dun.
Leg dit vervolgens weer 15 minuten in de koelkast (sorry guys).

Prik nu overal in de bodem een aantal gaatjes met een vork, leg daarna bakpapier over de taart heen en leg boven op het bakpapier de ongekookte rijst. We gaan nu namelijk het deeg "blind bakken" zodat je geen soppige bodem krijgt. Als je de bodem namelijk niet eerst bakt en de vulling er meteen bij in doet trekt er heel veel vocht in de bodem en krijg je nooit een lekker knapperig deeg.
Bak dit ongeveer 15 minuten met het bakpapier en de rijst en daarna nog 5 minuten zonder.
Haal het uit de oven en laat het afkoelen.

De temperatuur van de oven mag nu terug naar 160 graden. Smeer de bodem in met chocolade pasta :)

Smelt de overige chocolade en mix dit met de double cream en de melk. Dit moet je samen warm maken (het mag net niet koken). Ik wil geen klontjes zien!

Voeg vervolgens de eieren, suiker en vanille suiker toe. Giet dit vervolgens voorzichtig in de taartvorm. Dit moet ngeveer 40 a 50 minuten in de oven.

Als het klaar is moet de taart echt goed afkoelen. Als je er nu namelijk cacaopoeder overheen strooit smelt het gewoon.

Wat ik dus doe, is de taart lekker met aardbeitjes eten maar dat mag je helemaal zelf bepalen!

zondag 1 juni 2014

Spritsen

Ik heb een bepaalde, best wel leuke herinnering aan spritskoeken. Ik weet niet of het uberhaupt wel waar is, ik was best wel klein namelijk, maar om de één of andere reden denk ik bij spritskoeken aan mijn opa en de spritskoeken van de Hema. En dan het liefst die met dat lijntje roze glazuur eroverheen. Ik probeer nu even terug te denken aan de oude Hema in Dronten. Volgens mij zat het gebak rechts achterin, vlakbij de rookworsten. Oh oh oh, wat waren die spritskoeken lekker.

Dus sinds een paar weken probeer ik samen met mijn huisgenootje Hanne zelf ook heeerlijke spritkoeken te maken. De eerste keer mislukte rampzalig. We moesten eiwitten scheiden (dit ging helaas niet zo soepel en we hebben een aantal eieren weg moeten gooien) en ik gebruikte margarine i.p.v. roomboter waardoor de koekjes een beetje harder werden. En spritsen horen nou juist zo heerlijk luchtig te zijn.

Maar goed! hier het recept voor de heerlijke spritsen!

Spritsen!

  • 375 gram bloem
  • 250 gram roomboter op kamertemperatuur
  • 150 gram witte basterdsuiker
  • 50 gram kristalsuiker
  • 1 zakje vanille suiker
  • 2 theelepels caramelsiroop
  • 3 eieren
  • 2 eetlepels melk
  • 2 theelepels bakpoeder
als eerste meng je de boter, alle suiker en de caramelsiroop goed door elkaar. Ik wil geen klontjes zien!
Daarna splits je de eieren en bewaar je het eiwit want dit ga je stijf kloppen (tip, doe het met een mixer want als je het met een garde doet ben je 4x zo lang bezig en heb je aan het einde een lamme arm). 

Mix het eiwit door het boter-suiker mengel en voeg daarna de melk toe. Zeef daarna het bloem en voeg dit ook toe. In het begin kun je dit nog redelijk goed doen met een garde op een gegeven moment wordt het hier te dik voor.  Als je een ronde bal heb (zorg ervoor dat het goed zacht is en net niet meer plakt want je moet het straks door een spuitzak spuiten!) wikkel je het in vershoudfolie en leg je het een half uurtje in de koelkast. 

Verwarm de oven voor op 180 graden.

Na een half uur haal je het deeg uit de koelkast en kneed je hem nog eventjes goed door. Gooi niet alles in 1x in de spuitzak want dan moet je super veel kracht zetten en krijg je ook hier een lamme arm van. Als je deeg nou te dik is, voeg dan wat extra melk toe. 

Op de foto zie je hoe wij de koekjes gespoten hebben. 

Bak de koekjes 20 tot 25 minuten af en laat ze daarna goed afkoelen! niet aan gaan zitten want dan is dat mooie patroontje weg. 

EET SMAKELIJK!

zondag 25 mei 2014

Zoet en Hartige Pannenkoeken

Iedereen zegt altijd dat pannenkoeken bakken super makkelijk is, maar daar wil ik nog best wel eens over discussieren. Al wekenlang probeer ik een mooie pannenkoek te bakken die deze blog waard is. Ik gebruik verschillende soorten melk, verschillende hoeveelheden meel en eieren en probeer het beslag zonder suiker, met suiker en met vanille suiker te maken.

Ik denk dat het me vandaag gelukt is (jaja), vandaag had ik lekkere luchtige pannenkoeken die niet te hard waren maar toch een knapperig randje hadden. Topper ben ik.
Helaas heb ik, omdat ik dus blijf passen en meten, niet opgeschreven hoeveel ik van alles heb gebruikt (go Naomi!).

Maar ik ga het proberen te beschrijven.
Ik gebruikte in ieder geval 1 ei, 1 theelepel zout, 1 eetlepel speltzemelen en 1 eetlepel suiker.
Daarnaast gebruikte ik halfvolle melk en gewoon tarwebloem. Dit mixte ik allemaal door elkaar tot een vrij vloeibaar beslag (eerder maakte ik altijd dik beslag en daardoor zat ik altijd na 2 pannenkoeken helemaal vol).

Ook bakte ik de pannenkoeken op een half hoog vuur i.p.v. op hoog vuur wat volgens mij normaal wel moet. Maar trust me.. ze waren lekker.

Ik heb natuurlijk de meeste pannenkoeken gewoon gegeten met stroop of suiker maar ik heb een speciale zoete pannenkoek gemaakt met aardbeien en lichtbruine basterdsuiker en een hartige pannenkoek met kaas en Italiaanse kruiden.

Aardbeien pannenkoek
Snij 2 a 3 grote aardbeien in plakjes en zet daarna pas je pan op het vuur. Gooi wat boter of olijfolie in de pan en daarna giet je wat beslag erin (niet te dik!). Verspreid nu heel snel de plakjes aardbei over het vloeibare beslag en duw ze eventjes aan zodat ze goed vast zitten voor als je straks de pannenkoek moet "flippen". Als je de pannenkoek omdraait zet je het vuur nu wel hoog, want als je de aardbeien laat pruttelen op zacht vuur krijg je jam. Als je de pannenkoek weer uit de pan haalt draai je hem weer terug om en sprenkel je wat lichtbruine basterdsuiker over de pannenkoek. Tadaa.

Kaas pannenkoek
zorg ervoor dat je Italiaanse kruiden in huis hebt. Het liefst die van (ik geloof) 2 euro uit een glazen potje van de appie. Schaaf eerst ook een redelijk aantal plakjes kaas. Zet de pan op het vuur, boter of olie erin. Dan giet je ook het beslag erin en verspreid je snel de plakjes kaas over de pannenkoeken en strooi je wat kruiden erover heen. Als de onderkant nu licht bruin is klap je de pannenkoek dubbel. Als de onderkant mooi goudkleurig is draai je hem weer om en als de kaas goed is gesmolten en je pannenkoek mooi goudkleurig is, is hij helemaal klaar.

Eetsmakelijk!

maandag 12 mei 2014

Tomatengroentesoep, niet van oma, wel net zo lekker.

Deze tomatengroentesoep heb ik van mijn moeder leren maken. Hij is echt super simpel en heel snel klaar en je kan er een grote pan van maken en vervolgens de helft invriezen en op een random moment eruit halen om lekker op te eten.

Tomatengroentesoep
10 kopjes soep?


  • Maggi Basis voor Heldere Tomantensoep
  • half om half gehakt
  • soepgroente (diepvries)
  • vermicelli
  • toscaanse kruiden
  • zout
  • peper
  • maggi
Kruid het gehakt met wat zout en peper en rol hier de soepballetjes van. 
En nu kom ik waarschijnlijk heel lui over, maar de rest staat heel simpel en easy uitgelegd achterop de maggi basis pot. Breng de soep aan het einde nog op smaak met zout, peper, toscaanse kruiden en maggi en voila.

LEKKERT!

donderdag 24 april 2014

Grill me away

Hello hello hello.

Ook nu heb ik een langere tijd niet geblogd en nogmaals sorry. Sinds de verhuizing heb ik minder de behoefte om fancy te koken of rare koekjes te bakken, dus ik had niet echt iets om te posten. Dus om het voor mezelf wat makkelijker te maken en om wat meer te posten, zal ik minder complete recepten posten maar juist meer iets wat onderdeel kan zijn van een diner die je zelf dan samen kan stellen.
Vandaag: lekkere knapperige asperges met katenspek.

Ik haal m'n asperges op de markt omdat het daar niet zo f*&@#_!$#!^&cking duur is :)

gegrilde asperges met paprika en katenspek
per persoon

  • 4 asperges
  • 4 stukjes katenspek
  • kwart rode paprika
  • kwart gele paprika
  • peper
  • italiaanse kruiden
  • toscaanse kruiden
  • olijfolie/zonnebloemolie

Snij de onderkant van de asperges eraf en kook ze ong. 6 minuten beetgaar in een lange pan:P Zo min mogelijk knakken aub.
Terwijl de asperges lekker liggen te bubbelen, snij je de paprika in reepjes en deze leg je in een beetje olie in een ovenschaal. Hierover strooi je wat peper.

Als de asperges klaar zijn, giet je ze af en daarna wikkel je ze in het katenspek en leg je ze over de paprika heen. Hierover strooi je nogmaals wat peper, maar ook Italiaanse en Toscaanse kruiden en een klein beetje olie. Dit zet je vervolgens onder de grill en hou ze goed in de gaten want voor je het weet is het zwart (gebeurt vaak bij mijn grill).

Smakelijk eten!:D

zaterdag 5 april 2014

Het spijt me!


SORRY SORRY SORRY SORRY. Ik kan niet vaak genoeg sorry zeggen dat ik al meer dan 2 weken niks gepost heb! Maar die tentamenweek en toen "hey, je moet verhuizen" zorgde voor veel stress en weinig tijd om te koken en te bloggen. Ik ga morgen weer iets fancy nieuws maken dus hopelijk is het dan allemaal weer helemaal super super super.

Hier het recept voor cranberry-appeljam

Potje cranberry-appeljam

  • bakje cranberries van de albert cuyp
  • 2 appels
  • sap van een halve citroen
  • 6 gelatineblaadjes (appie)
  • kleeein beetje water
  • half kopje suiker

snij de appels in kleine stukjes en breng deze samen met de cranberries en een klein beetje water aan de kook. goed roeren, dan bakt het niet aan! voeg nu ook het sap van de citroen toe. Dit laat je ongeveer een half uur doorkoken, maar blijf dus goed roeren.
5 minuten voordat dat half uur om is, week je de gelatine in een bak koud water. Na 5 minuten goed uitknijpen en toevoegen aan je fruitprutsel. Laat dit nog even 2 minuutjes doorkoken.
Ik heb aan het einde alles flink gestampt en door een zeef gehaald want ik hou meer van gelei dan jam met stukjes, maar dat mag je helemaal zelf weten.

Bewaar het in een pot die je hebt gewassen met kokend water en laat het goed afkoelen voor je de deksel erop doet en het eventueel in de koelkast zet.

woei!

woensdag 19 maart 2014

SOK - studie ontwijkende koekjes

Volgende week is het tentamenweek en dat betekend maar één ding. Nee niet studeren, maar studie ontwijkend gedrag. Bij mij is dit vaak in de vorm van schoonmaken (gebeurt dus ongeveer 4x per jaar) of dingen koken of bakken. Vandaag was dit in de vorm van koken én bakken.
Eerst hebben Rowan en ik zelf pasta gemaakt met zalm, deze zal ik morgen online zetten (alvast excuses voor de onaantrekkelijke presentatie, maar geloof me hij was lekker), toen heb ik cranberryappel jam gemaakt (zal ook ergens deze week wel verschijnen) en ten slotte heb ik appelrozijnenkoekjes gemaakt. Deze koekjes heten vanaf nu officieel 'studie ontwijkende koekjes'.

Studie ontwijkende koekjes
6 stuks (groot)


  • 2 kopjes meergranenbloem
  • 75 gram roomboter (kamer temp)
  • 3/4 kleine appel
  • handje rozijnen
  • 100 gram suiker
  • snufje zout
  • theelepel koekkruiden
verwarm de oven voor op ±200 graden
Was de rozijntjes in lauw water en giet ze na ongeveer 2 minuutjes af.
 Snij de appel in kleine stukjes. Snij ook de boter in stukjes, dat kneed wat makkelijker.
Mix vervolgens alle ingredienten door elkaar heen en ga maar eens even stevig 'kleien'. Zorg dat het deeg stevig is en niet plakkerig. Als het plakkerig is, voeg je nog wat bloem bij.

Maak 6 (of meer) evengrote ronde koekjes zodat ze tegelijkertijd gaar zijn en zorg ervoor dat ze op een platte ondergrond op bakpapier liggen.

ze moeten ongeveer 20 minuutjes in de oven, misschien iets langer.

Bon appetit en succes met studeren voor de studentjes out there.

maandag 17 maart 2014

buttercookie

Ik weet niet of ze dit heerlijke gerecht in Engeland kennen, maar anders is dat jammer voor hen. Al hoewel ik zelf nog niet het recept van de heerlijke boterkoek helemaal in de vingers heb, smaken ze erg lekker en wil ik jullie dus zeker niet onthouden. Het is heel simpel, het deeg moet alleen even in de koelkast.

Boterkoekjes
7 stuks of één grote plak

  • 120 gram bloem
  • 120 gram roomboter op kamer temperatuur
  • 35 gram kristalsuiker
  • 35 gram witte basterdsuiker
  • zakje vanille suiker
  • 1 losgeklopt ei
  • snufje zout
  • cupcake bakblik
Verwarm de oven voor op 200 graden.

Mix de boter, het zout en het suiker (alle 3 de soorten) tot een romige massa. Voeg daarna beetje bij beetje het bloem toe tot het een stevig deeg wordt. Dit moet je afgedekt een half uur in de koelkast zetten.

Vet het cupcakeblik in met boter.

Als het deeg een half uur in de koelkast heeft gestaan, haal je het eruit en verdeel je dit over 7 gelijke porties. Klop vervolgens een eitje los en smeer de bovenkant van je koekjes lekker in. Met een vork kun je nog een sjabloontje in je koekjes maken, maar wees wel voorzichtig.

dit moet ongeveer 20 a 30 minuten in de oven en laat het daarna GOED afkoelen voor je gaat eten, nee ook niet lauw eten. KOUD!

eet smakelijk!

zaterdag 15 maart 2014

Zoet-Zure gezonde muesli koekjes

Om maar weer even terug te gaan naar een gezonde snack, hier lekkere zoet-zure muesli koekjes. Ze zijn lekker plakkerig en gezond! Lekker voor mee in de broodtrommel naar college (ja ik heb nog een broodtrommel) of gewoon nu zo omnomnom achter de laptop. Ik heb me gisteren enorm uitgesloofd om de foto er een beetje decent uit te laten zien (zoals je hiernaast ziet), dus ik hoop dat ik snel van jullie allemaal reacties krijg met "ohh naomi, die mueslikoekjes, die waren zoo lekker!"


En ze zijn eigenlijk wel "het snelle tussendoortje van de week" waardig, maar die hadden we deze week al.
Je kan er natuurlijk ook gewoon muesli repen van maken, dan moet je ze gewoon wat langer en hoger maken. No biggie.


3 muesli koekjes (maar ik eet ze per half)

  • kopje muesli
  • 2 eetlepels honing
  • rasp + sap van een halve citroen 
  • eetlepel lijnzaden
  • eetlepel zonnebloempitten
  • eetlepel goji bessen
  • theelepel cacao poeder
  • theelepel koek en speculaaskruiden
  • 2 eetlepels water
  • 1 eetlepel zonnebloemolie
  • bakpapier
verwarm de oven voor op 200 graden.

mix alles in een blender/mixer tot een kleverige maar toch stevige massa. Als je ronde koekjes wil, zoals de mijne, kun je ze door middel van kookringen mooi rond maken (zorg voor een platte ondergrond en bak ze op bakpapier, anders blijven ze plakken). 
Je kan ook één grote koek maken in bijv. een brownieblik en dan maak je inkepingen in de grote koek als je ze uit de oven haalt (want dan is de koek nog zacht) en dan kun je ze later breken of snijden.

Doe ze in de oven op de manier waarop jij wilt, ongeveer 25 minuten, en laat ze daarna goed afkoelen zodat hij ook een stevige bite krijgt. Als je ze meteen gaat eten, zijn je koekjes kleverig en zacht ipv lekker knapperig!


vrijdag 14 maart 2014

Pre Pasen

Ik weet het, het is nog lang geen Pasen. Op 20 en 21 april mogen we ons weer heerlijk vol stoppen met allemaal lekkers wat 's ochtends op tafel staat. Van gekookte eitjes tot chocolade eitjes, van vers gerolde croissantjes tot lekker paasbrood, het paasontbijt is altijd een feest. 

Een paar jaar geleden was ik Au Pair en toen heb ik ter gelegenheid van Pasen super schattige Paashaas cupcakes gemaakt. De foto is dus een beetje oud, maar ik garandeer je dat deze cupcakes goed worden ontvangen. Toen ik deze cupcakes maakte, gebruikte ik nog boter ipv mascarpone. Dus het kan zijn dat het gele er straks wat anders uit gaat zien.

Ga maar vast oefenen!


6 paashaas cupcakes

  • 200 gram bloem
  • 200 gram suiker
  • 3 eieren
  • 200 gram boter, kamertemp
  • 1 eetlepel melk
  • 1 eetlepel vanille essence (zakje vanille suiker)
  • theelepel bakpoeder
  • 120 ml slagroom
  • 125 gram mascarpone
  • 30 gram poedersuiker
  • 1 theelepel vanille essence (of wederom zakje)
  • gele kleurstof
  • witte marsepein/fondant
  • zwarte en rode versier-pen (dr oetker, zie recept over kerstkoekjes)
  • chocolade eitjes, deze komen uit Engeland
  • muffinvormpjes
Verwarm de oven voor op 180 graden. 

Klop de 3 eieren eerst lekker los met een garde en voeg vervolgens de suiker toe tot dit een glad geheel is. Snij de boter in kleine stukjes en voeg dit toe. Zorg ervoor dat er zo min mogelijk, het liefst geen, klontjes in zitten. Vervolgens voeg je beetje bij beetje de bloem toe, ik gebruik volkorenspeltbloem, maar gewone is natuurlijk ook prima. Voeg daarna de bakpoeder en de vanille essence toe en vul 6 vormpjes.
Zet dit ongeveer 20 tot 30 minuten in de oven.

De frosting kun je het beste pas maken als de cupcakes bijna zijn afgekoeld, want anders gaat het smelten en lopen. Dus maak eerst de schattige konijntjes. Ik denk dat op basis van het plaatje het vrij duidelijk is hoe het konijntje eruit moet zien, vergeet het schattige bolletje op de achterkant niet!

Voor de frosting: gebruik een vetvrije schone kom. Mix de mascarpone met de vanille en de poedersuiker. In een andere kom maak je de slagroom tot een redelijk stevige massa. Pas op dat je niet te lang doorgaat, dan krijg je een rare klonterige waterige massa :(
Mix de slagroom met de mascarpone, smeer het op de cupcake, konijntje erop en voila. lekker hoor!